

For some time now I’ve been trying to change the lighting in the kitchen counter. It uses halogen lamps and wasn’t practical. So I decided to replace it with a LED strip. In order to automate it i added a wemos. Let’s begin.
Materials
- Wemos D1 Mini
- IR Movement Sensors
- Led Strip
- Relay
- 12V power supply
- Car Cigarette Lighter Charger
- Protoboard
- 22AWG Cables (multiple colors)
- UTP cable
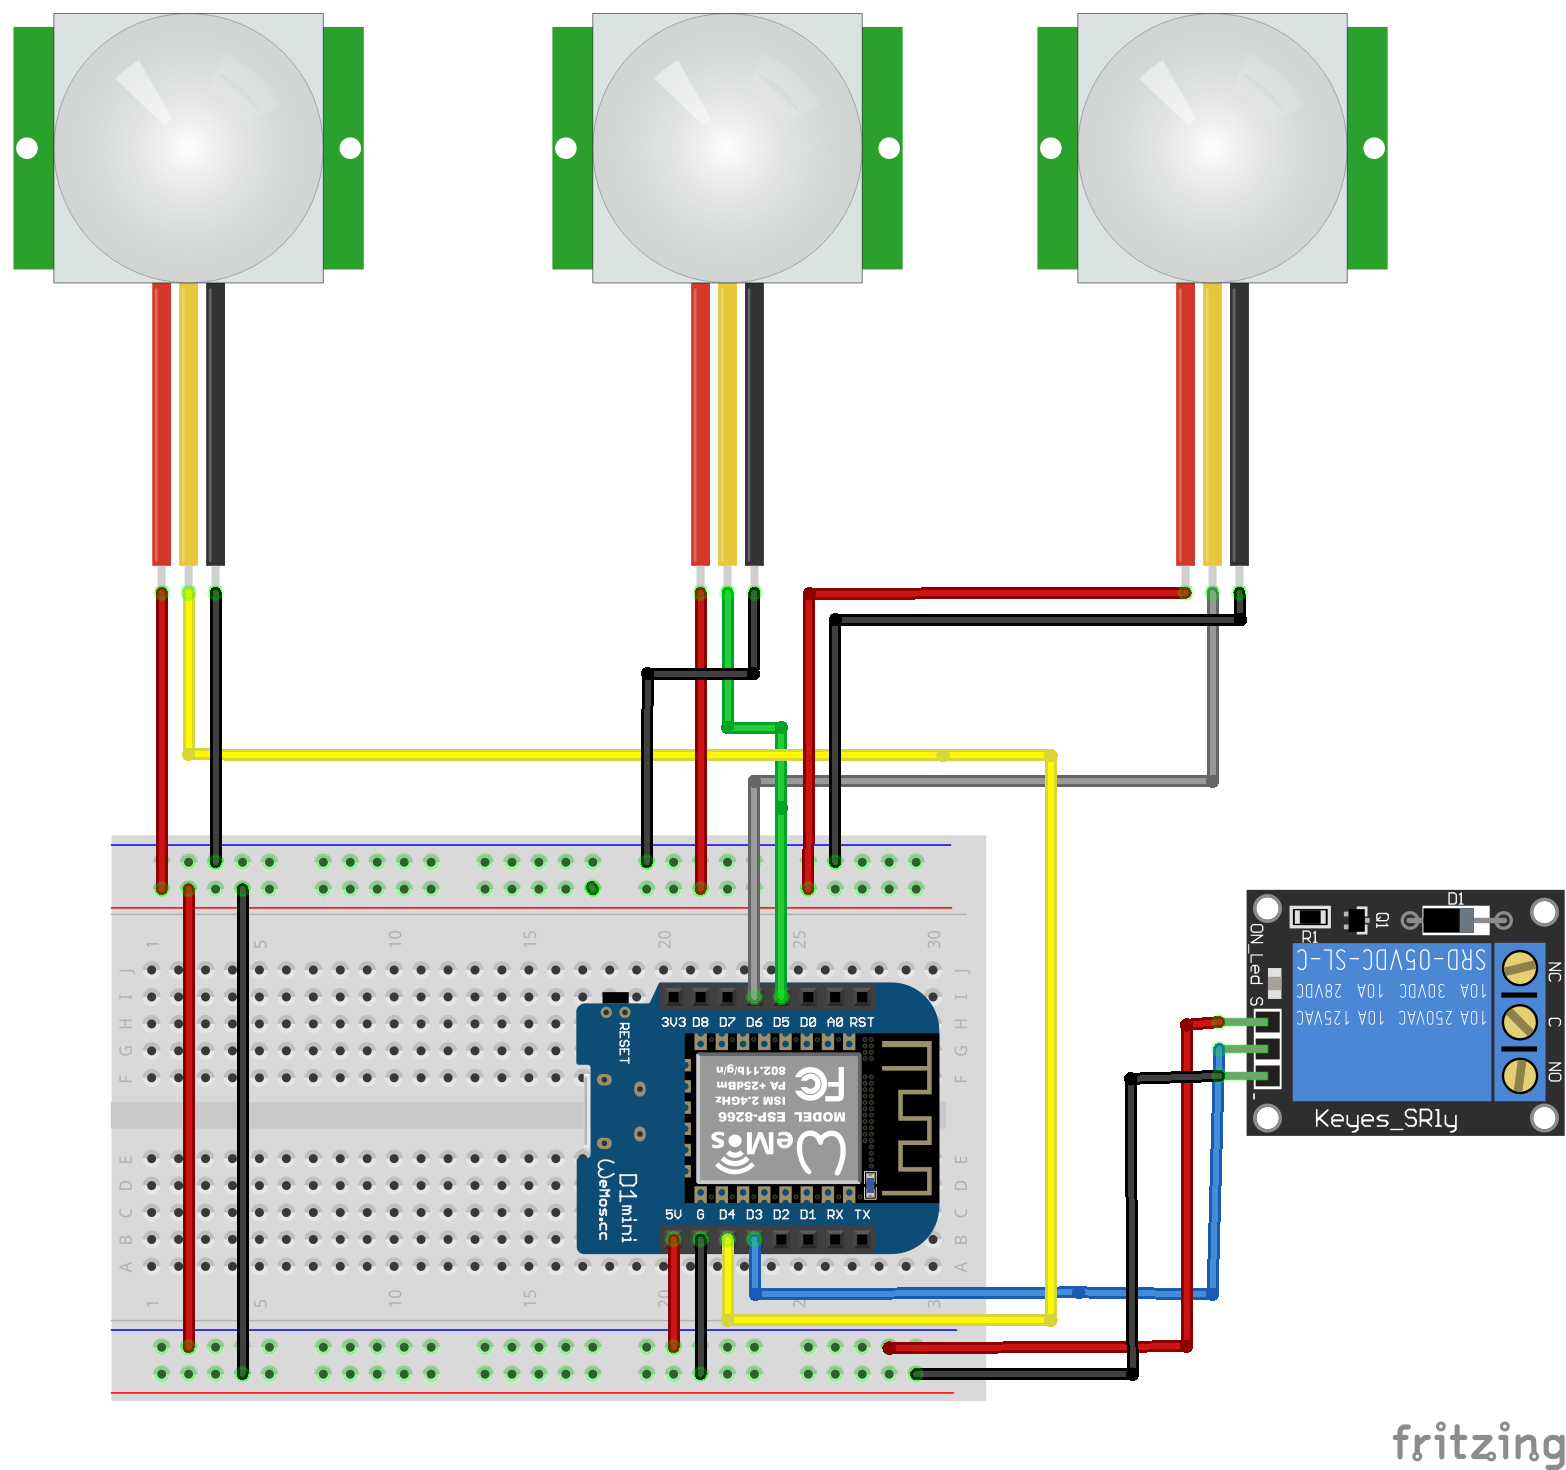
Schema
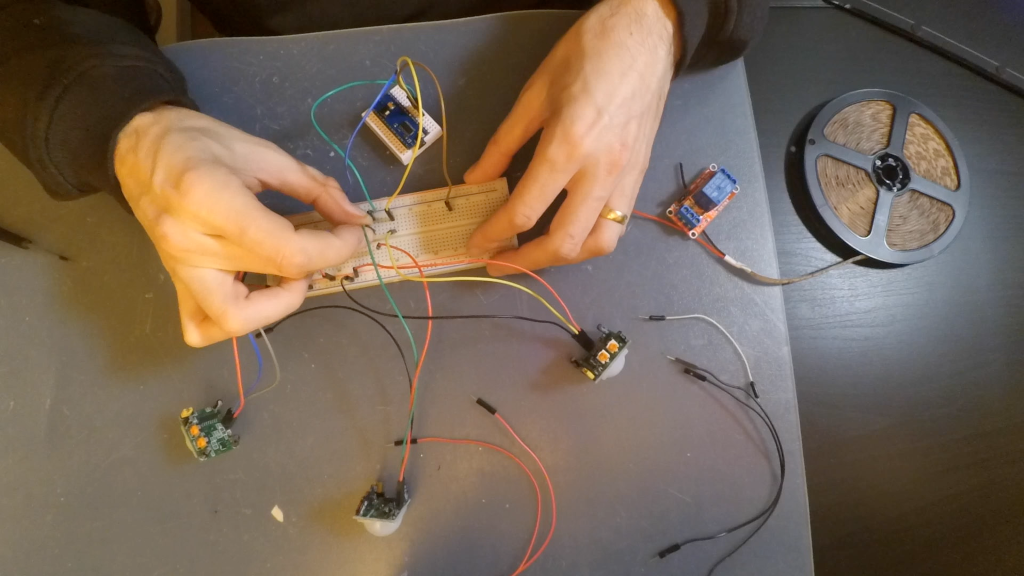
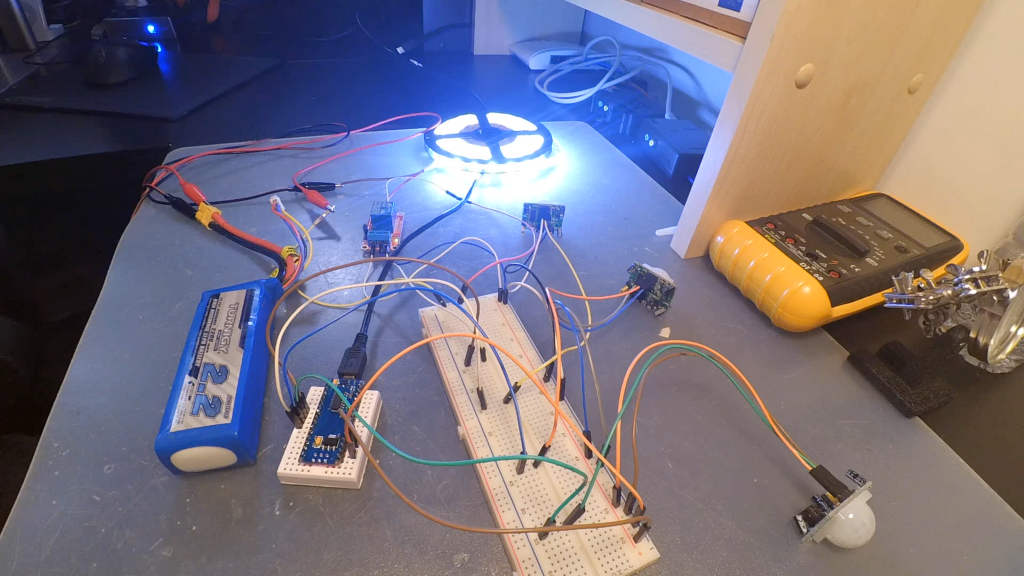
Assembly
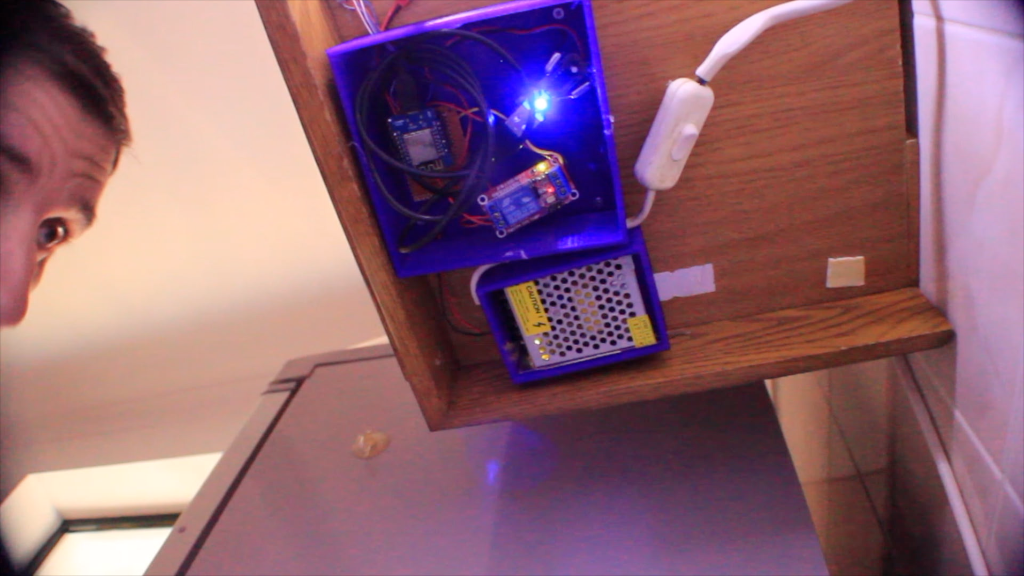
I started by creating a circuit prototype. This is controlled by a Wemos D1 Mini that receives data from three motion sensors. When there’s movement, the Wemos D1 Mini activates the relay that controls the led strip. This is turned on for 30 seconds. After these 30 seconds, if there’s movement, the strip stays connected. Otherwise is turned off.
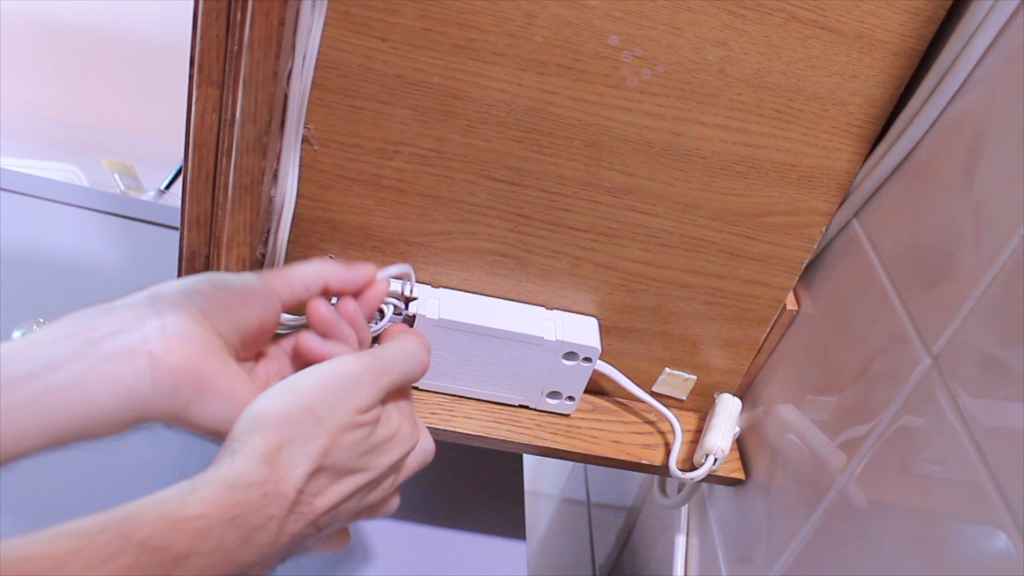
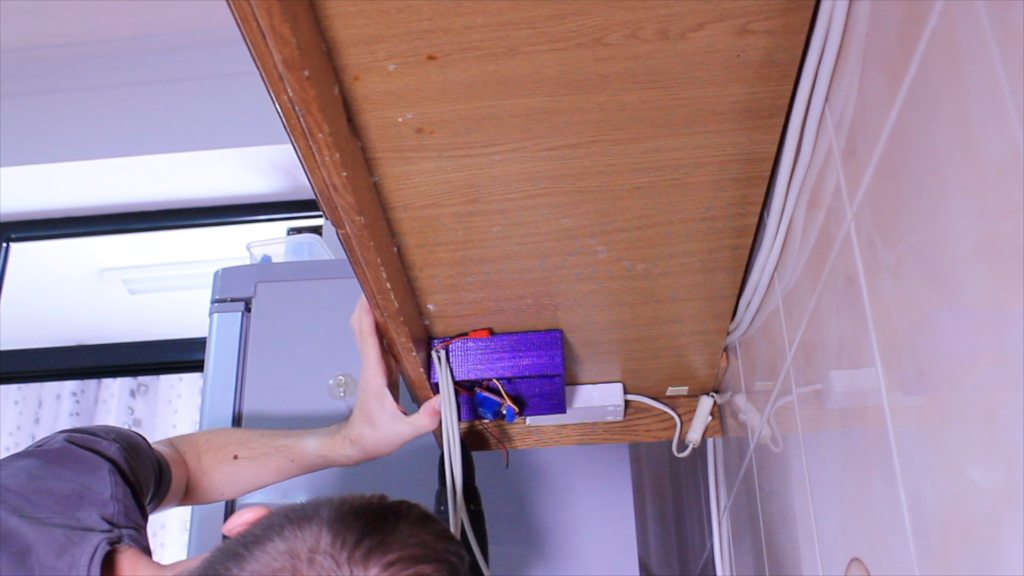
To feed the circuit, some conversions were necessary. The main power is 220V. The led stripe receives 12V and the Wemos D1 Mini is powered by 5V. In order to carry out the respective conversions, I used a 220V to 12V transformer. An output of this feeds the led strip. A second output feeds a car cigarette lighter charger. This converts the 12V into 5V in a simple and compact way. Having this one USB output, you can directly feed the Wemos D1 Mini.
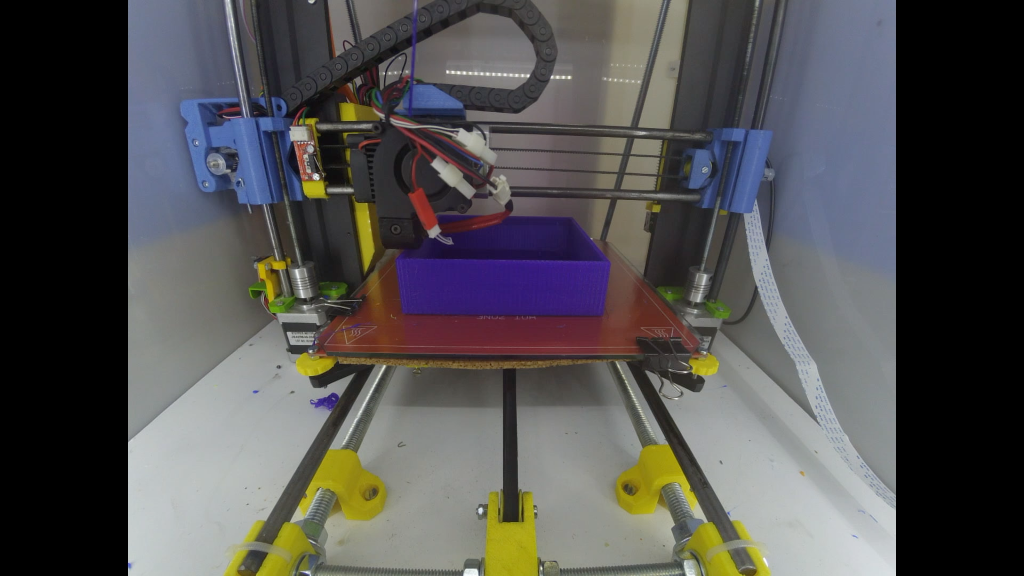
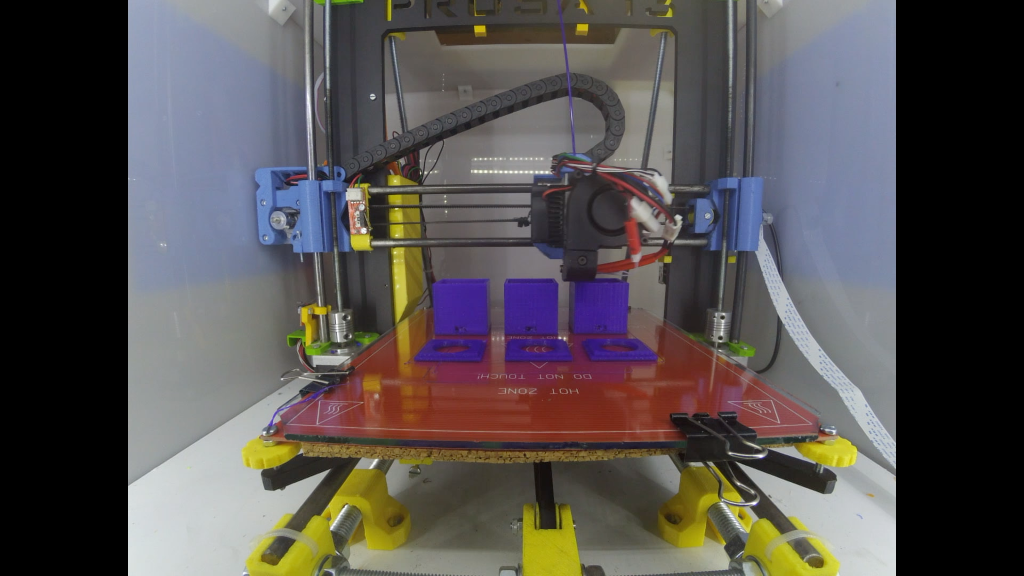
To store all components, three types of structures were created in Autodesk Fusion 360. One for the power supply, one for the circuit and one for the motion sensors.
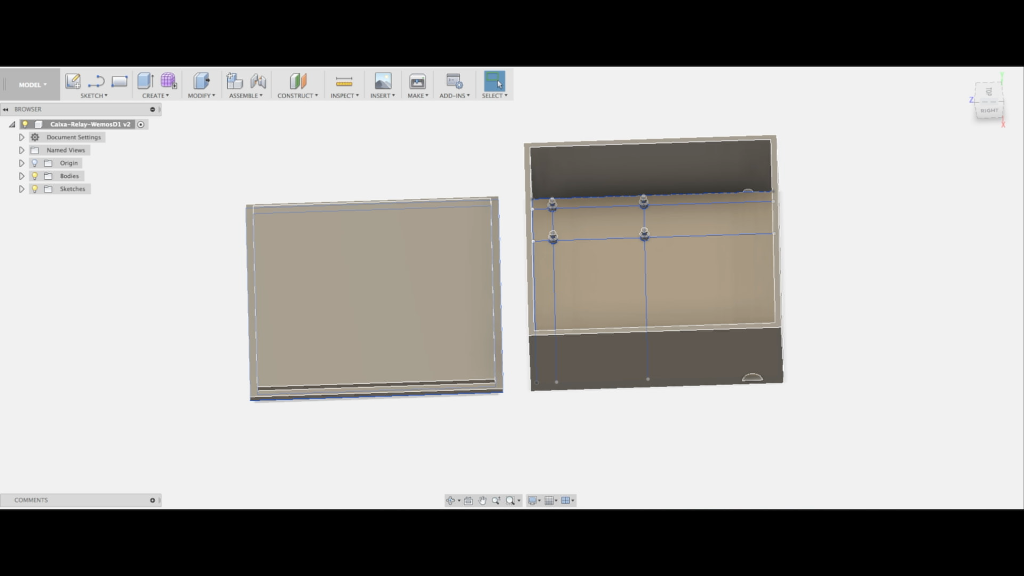

Both were printed on the Prusa i3 Hephestos
In order to connect each sensor to the Wemos D1 Mini i used UTP cable, because it is a compact cable and has little signal loss.

Code
#include <ESP8266WiFi.h>
#include <PubSubClient.h>

#define motion01 D5
#define motion02 D6
#define motion03 D7
#define led_strip D1

#define MQTT_AUTH false
#define MQTT_USERNAME "username"
#define MQTT_PASSWORD "password"

int smotion01 = 0;
int smotion02 = 0;
int smotion03 = 0;

int lamp_mode = 0; //0-auto 1-manual

const char* ssid = "<SSID>";
const char* password = "<PASSWORD>";

const String HOSTNAME = "<NAME>";
const String MQTT_LIGHT_TOPIC = "<TOPIC>";
const String MQTT_LIGHT_STATE_TOPIC = "<STATE_TOPIC>";
const char* MQTT_SERVER = "<SERVER>";

WiFiClient wclient;
PubSubClient client(MQTT_SERVER,1883,wclient);


void turn_on(){
 digitalWrite(led_strip,HIGH);
 client.publish(MQTT_LIGHT_STATE_TOPIC.c_str(),"ON");
 delay(30000);
}

//-------------------------------------------

void turn_off(){
 digitalWrite(led_strip,LOW);
 client.publish(MQTT_LIGHT_STATE_TOPIC.c_str(),"OFF");
 delay(100);
}

//-------------------------------------------

void checkSensors(){
 smotion01 = digitalRead(motion01);
 Serial.print("smotion01=");
 Serial.println(smotion01);
 delay(100);
 smotion02 = digitalRead(motion02);
 Serial.print("smotion02=");
 Serial.println(smotion02);
 delay(100);
 smotion03 = digitalRead(motion03);
 Serial.print("smotion03=");
 Serial.println(smotion03);
 delay(100);
 if( (smotion01 == HIGH) || (smotion02 == HIGH) || (smotion03 == HIGH) ){
 turn_on();

 }
 else{
 turn_off();
 }

}

//-------------------------------------------
void callback(char* topic, byte* payload, unsigned int length) {
 String payloadStr = "";
 for (int i=0; i<length; i++) {
 payloadStr += (char)payload[i];
 }
 Serial.println(payloadStr);
 String topicStr = String(topic);
 if(topicStr.equals(MQTT_LIGHT_TOPIC)){

if(payloadStr.equals("off")){
 turn_off();
 lamp_mode = 1;
 }
 else if(payloadStr.equals("on")){
 turn_on();
 lamp_mode = 1;
 }
 if (payloadStr.equals("auto")){
 Serial.println("auto");
 lamp_mode = 0;
 }
 }
}


//-------------------------------------------


void setup() {
 Serial.begin(115200);
 client.setCallback(callback);
 pinMode(motion01, INPUT);
 pinMode(motion02, INPUT);
 pinMode(motion03, INPUT);
 pinMode(led_strip, OUTPUT);

WiFi.begin(ssid, password);
 WiFi.mode(WIFI_STA);
 Serial.println(".");
 // Aguarda até estar ligado ao Wi-Fi
 while (WiFi.status() != WL_CONNECTED) {
 delay(500);
 Serial.print(".");
 }
 Serial.println("");
 Serial.print("Ligado a ");
 Serial.println(ssid);
 Serial.print("Endereço IP: ");
 Serial.println(WiFi.localIP());
}

//-------------------------------------------

void loop() {

if (WiFi.status() == WL_CONNECTED) {
 client.loop();
 checkSensors();
 }
}
Installation
After dismantling the current lighting, I started installing the new system. First installing the section that stores the circuit, then the various sensors and led strip and at the end the power supply. Although, initially, the LED strip was installed with fasteners, after was used double-sided tape.
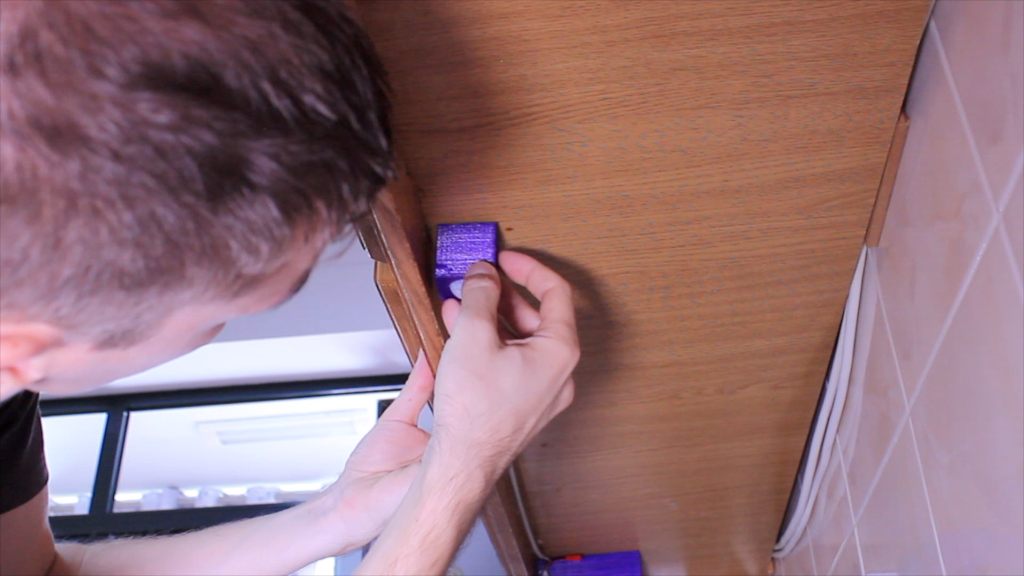
After installation the different motion sensors were adjusted for the corresponding distance between these and the bench.
Currently this is an independent system but it’s prepared for integration with a Smart Home system in the future.